PostgreSQL pgadmin4 is one of the most popular and widely used graphical user interface programs to manage postgres databases. To simply explain, pgAdmin is for PostgreSQL just like the phpMyAdmin is for MySQL and MariaDB.
In this tutorial, we will learn to install and configure the pgAdmin4 on ubuntu version 22.04. Note that, this might also work for the previous versions of Ubuntu such as versions 20 and 18. Now without wasting time, let’s dive into it.
Also read: PostgreSQL – A Complete Introduction, History, and Features
A Quick Introduction to pgAdmin4
As stated above, pgAdmin is a graphical interface to manage PostgreSQL databases. It is a free as well as open-source software program that anyone can use. It is one of the best and most popular PostgreSQL database administration software in the market.
One of the most significant features of the pgAdmin4 is that it can run on almost all major operating systems such as Windows, Linux, macOS, and other UNIX systems.
The pgAdmin is available in two types of installations, the server, and the desktop. The server deployment is installed as the web application and can be accessed through browsers. The advantage of server deployment is that multiple users can concurrently access it. On the other hand, desktop deployment is the desktop application installed on the computer locally.
In this tutorial, we will see both types of installations and how to access the database through the web application as well as the desktop application.
Setup the Password for the PostgreSQL user
When you install the PostgreSQL server and the client, there is no password set by default. However, you can log in to the PostgreSQL client using the peer connection method. You can read about the peer connection method in this tutorial.
To explain the peer connection method, in short, PostgreSQL will check if the username you have entered is present as an OS user. If yes, then it will log you in.
However, to connect to a server, you need a password. Therefore, we will first set the password to our Postgres user from the command line.
Follow the steps given below to set the password.
- First login to the PostgreSQL client using the peer connection method using the following command.
sudo -u postgres psql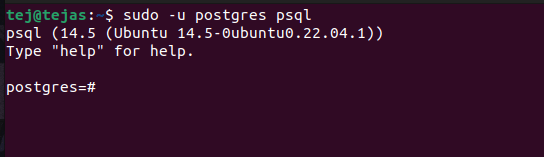
- Now enter the command \password to enter the password for your postgres user. Note that, ‘postgres’ is your username for the PostgreSQL system.
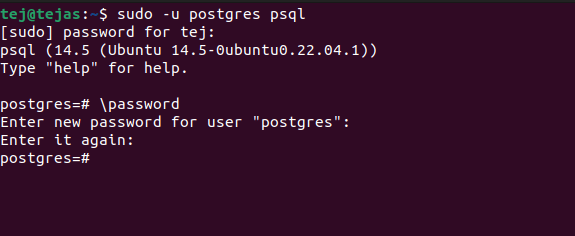
- It will ask you to enter the password again for confirmation. And that’s it. Your password has been successfully set/changed.
- Now you can proceed to install the pgAdmin on your system.
Install pgAdmin on Ubuntu 22.04
The following method works on some other Linux-based distributions as well such as Debian, Pop os, Elementary OS etc.
Now follow each step carefully given below.
- The first and most important thing is to update and upgrade ubuntu’s packages.
sudo apt update
sudo apt upgrade- Add the GPG key first-
curl -fsSL https://www.pgadmin.org/static/packages_pgadmin_org.pub | sudo gpg --dearmor -o /etc/apt/trusted.gpg.d/pgadmin.gpgCode language: JavaScript (javascript)- The next step is to add the repository using the given command. Note that, pgAdmin is not available on ubuntu’s official package repository.
sudo sh -c 'echo "deb https://ftp.postgresql.org/pub/pgadmin/pgadmin4/apt/$(lsb_release -cs) pgadmin4 main" > /etc/apt/sources.list.d/pgadmin4.list'Code language: JavaScript (javascript)- Now we will write a command to install both the web application as well as a desktop application.
sudo apt install pgadmin4- If you want to install only one of the two applications, use the following command.
sudo apt install pgadmin4-desktop
sudo apt install pgadmin4-web- Now you have to configure the pgAdmin user account for the web application. Here, you have to set the email id and the password for your user account. To configure this, enter the following command which will open the configuration shell script.
sudo /usr/pgadmin4/bin/setup-web.sh- The prompt will ask you to enter your email id and password. Using these credentials, you can log in to the web application. After entering the details, it will ask you to restart the apache server for changes to take place. Simply type y to restart the server. And that’s it! Your pgAdmin4 server mode is configured.
- In the end, the prompt will show the URL where you can access the web application interface from. Note that down or simply click on it.
- It will redirect you to the web browser and you will see the pgadmin web interface below.
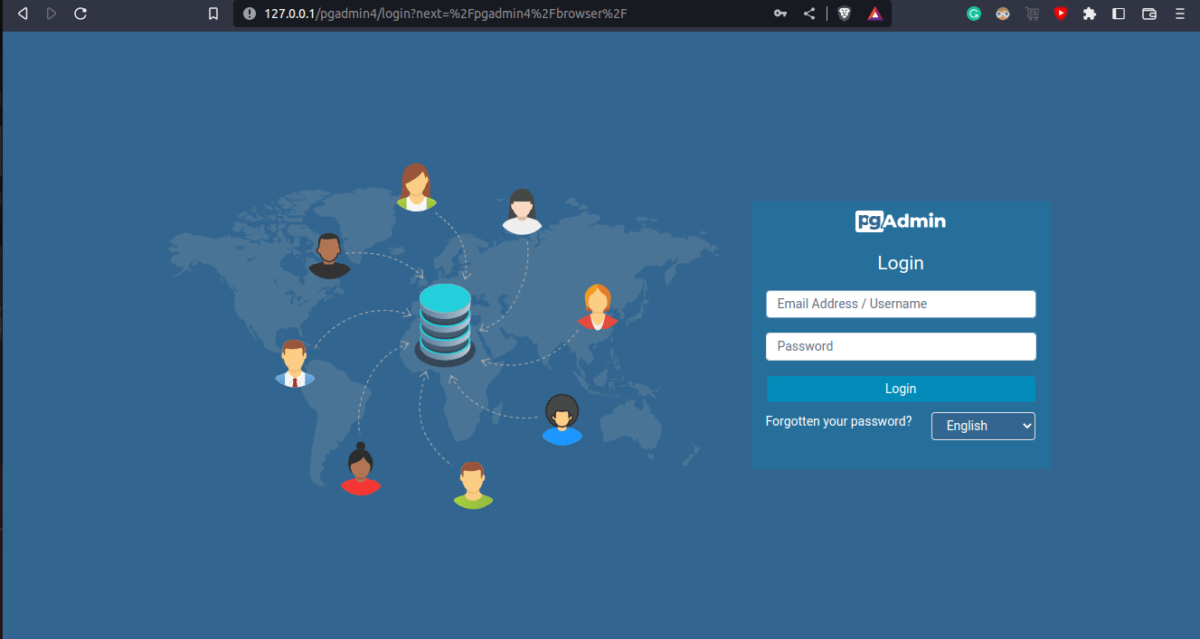
- Enter the email id and the password you set up earlier to log in to your pgAdmin account.
Connect to the Server using pgAdmin
To connect to the server, the same method is used for the web app as well as the desktop app. The interface for both applications is also exactly the same. Therefore, the steps given below are applicable to both applications.
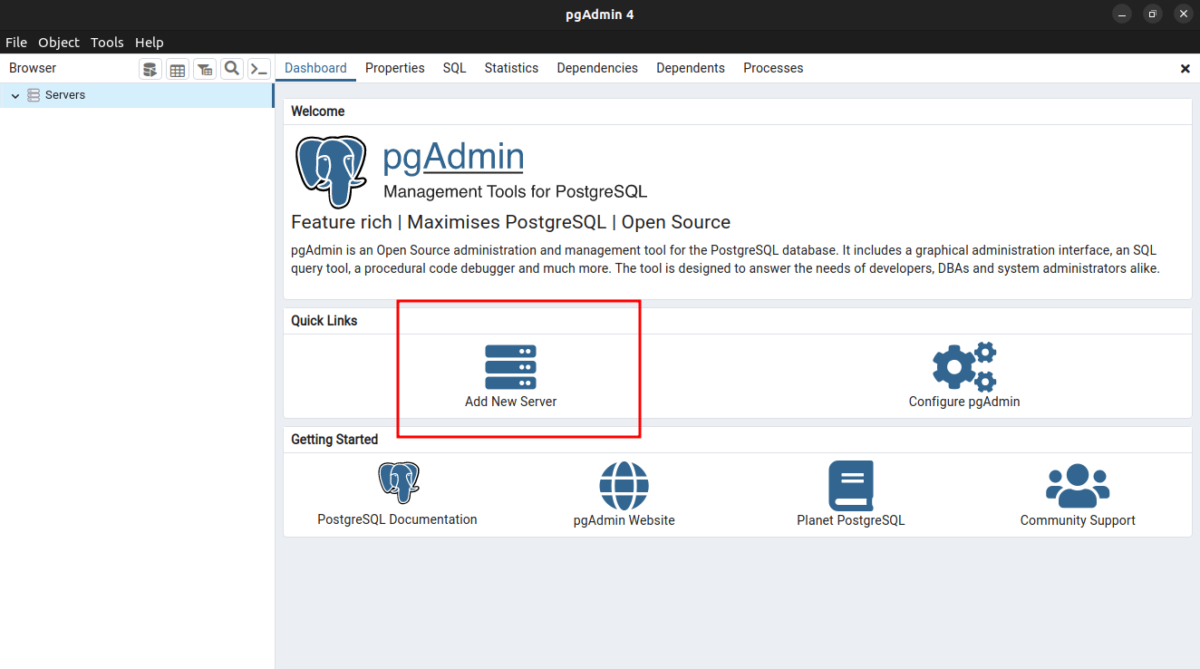
- Open the pgAdmin4 dashboard and click on the “add new server” option.
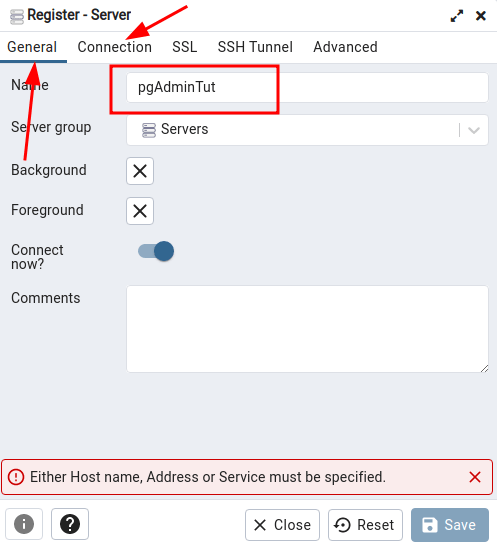
- Now you will be asked to enter the server name. This can be anything you want.
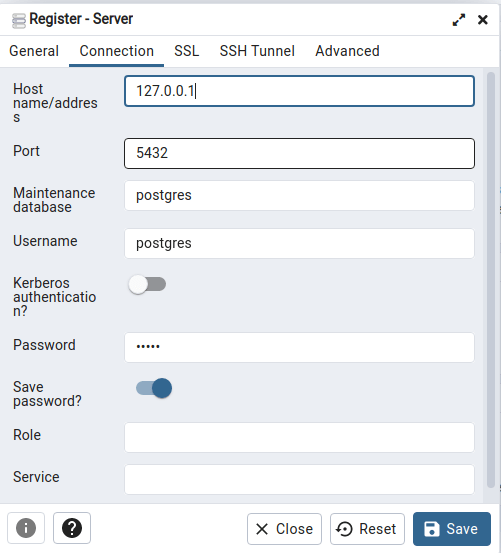
- Click on the connection tab and enter the details such as hostname or address, port number, username, and password of the user. If you want to access the remote database, you have to enter the IP address of that database server. If you are accessing the local database, then it will localhost address in most cases.
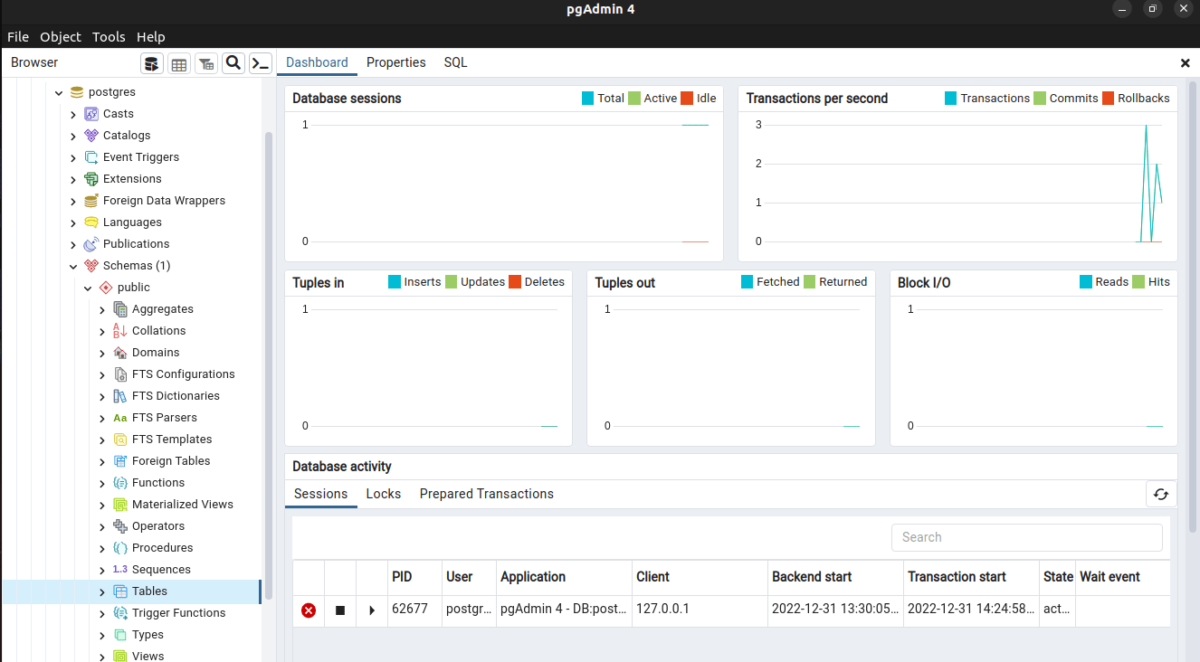
- Click on the save button. If everything is correct then you will be able to see the database dashboard. Otherwise, you will see an error.
- To check the database tables, click on the server name at the left side > Databases > (your database name) > schemas > Tables
Conclusion
The pgadmin is an excellent management tool that you can use for any kind of project, even for enterprise applications. It is absolutely free and there are no fees for the usage of the tool. However, it is recommended not to rely on the GUI tool all the time and should use the CLI for database operations for a better experience and good practice.