SQL Server 2019 is a useful tool, ideal for the development and production of desktop, web, and small server applications. However, we need to connect the SQL Server client to the Server before writing queries. In this tutorial, we will see how to connect to the SQL Server using the SQL Server management studio.
To interact with the SQL Server database, we need the graphical user interface which is way easier than the command line tools. Therefore, SQL Server Management Studio is the best option to Connect to the server, authenticate and start writing queries.
Also read: How to Install SQL Server 2019 on Windows
What is a SQL Server Management Studio?
SQL Server Management Studio or simply SSMS allows you to manage SQL Server through a graphical interface. It can be used to access, develop, administer, and manage SQL Server databases, Azure SQL Databases, and Azure Synapse Analytics. SSMS will run only on Windows.
Before getting started to see how to connect to the SQL Server from the SSMS, let’s see some terminologies first.
What is Database Engine?
It is a core service for storing, processing, and securing data. The Database Engine can be used for controlled access and rapid transaction processing to meet the requirements of the most demanding data-consuming applications.
What is SQL Server Name?
It is the local server running SQL Server. You can execute the query “SELECT @@SERVERNAME;” to find the Server Name.
What is Authentication?
There are two ways of authentication if you have enabled mixed modes of authentication, which are Windows Authentication and SQL Server Authentication. This process can be identified during the connection of SQL Server 2019 using SQL Server Management Studio.
Now we will see step by step guide to connecting to the server in SQL Server using SSMS.
How to Connect to the Server In SQL Server
Follow the steps given below in your SQL server management studio.
- Go into search on your Windows computer and search for Microsoft SQL server.
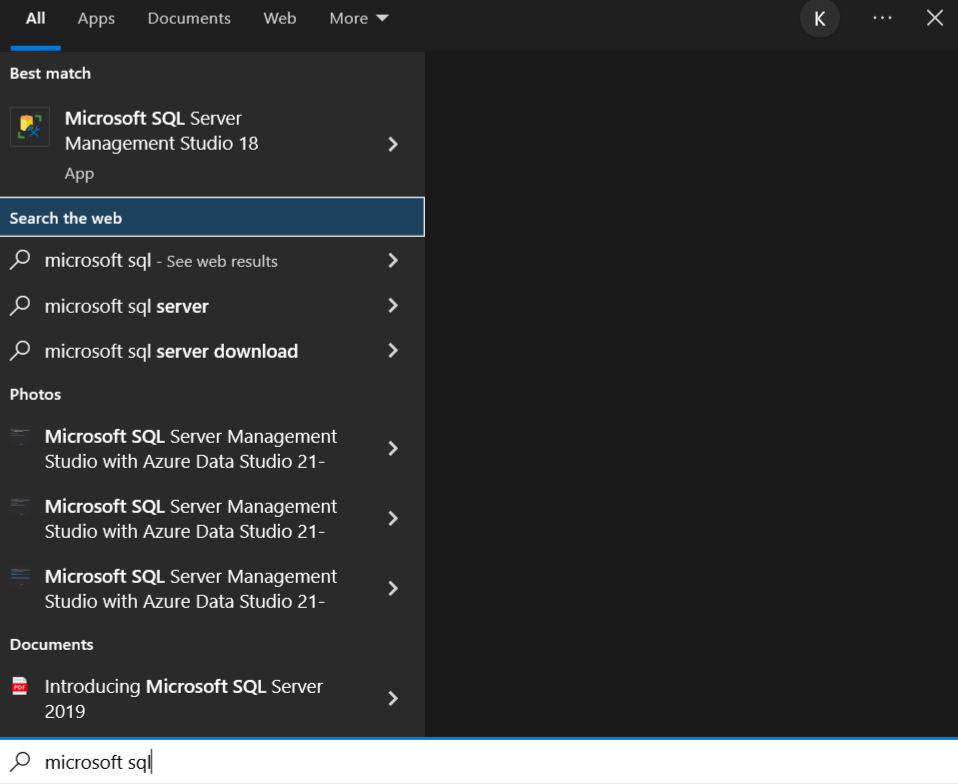
- Click on “Microsoft SQL Server Management Studio 18”.
- It will show you a screen “Connect to Server”
- First, select the server type. You can choose “Database Engine“.
- Select the Server name. You can also choose to browse for more, in case you want a different server name.
- Now choose an authentication type.
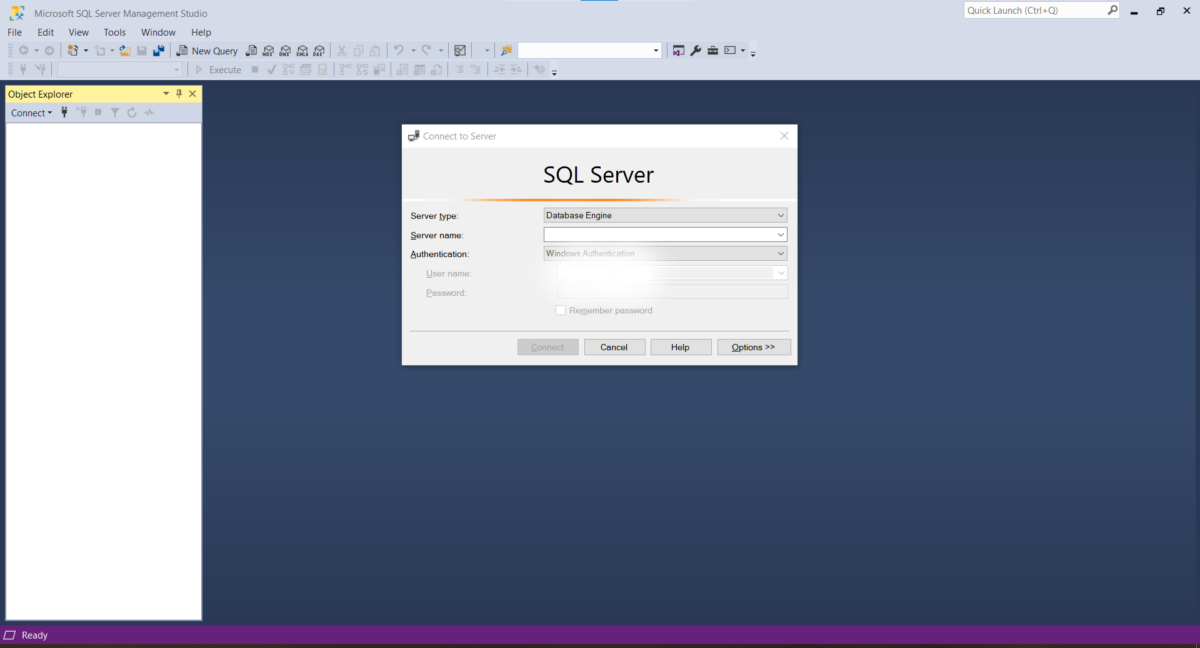

- Now click on connect. A new connection will be established.
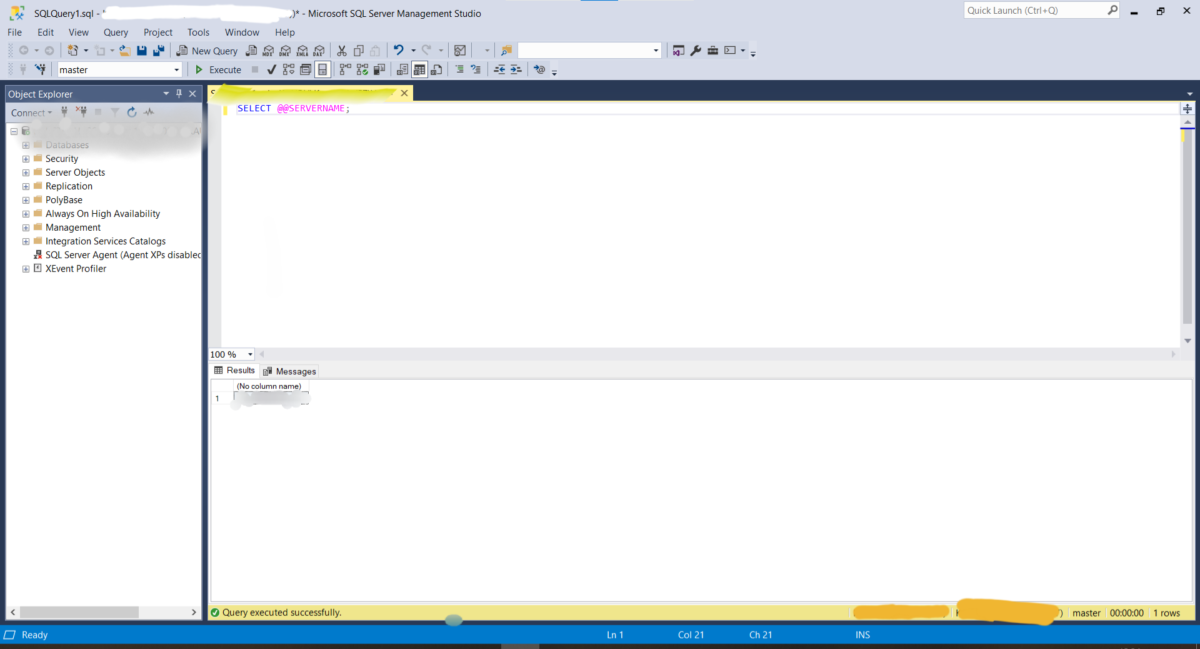
- If you want to confirm your Server Name, go to File then go to new and click on Query with the current connection. Now type ” SELECT @@SERVERNAME;”. You will see the current Server Name.
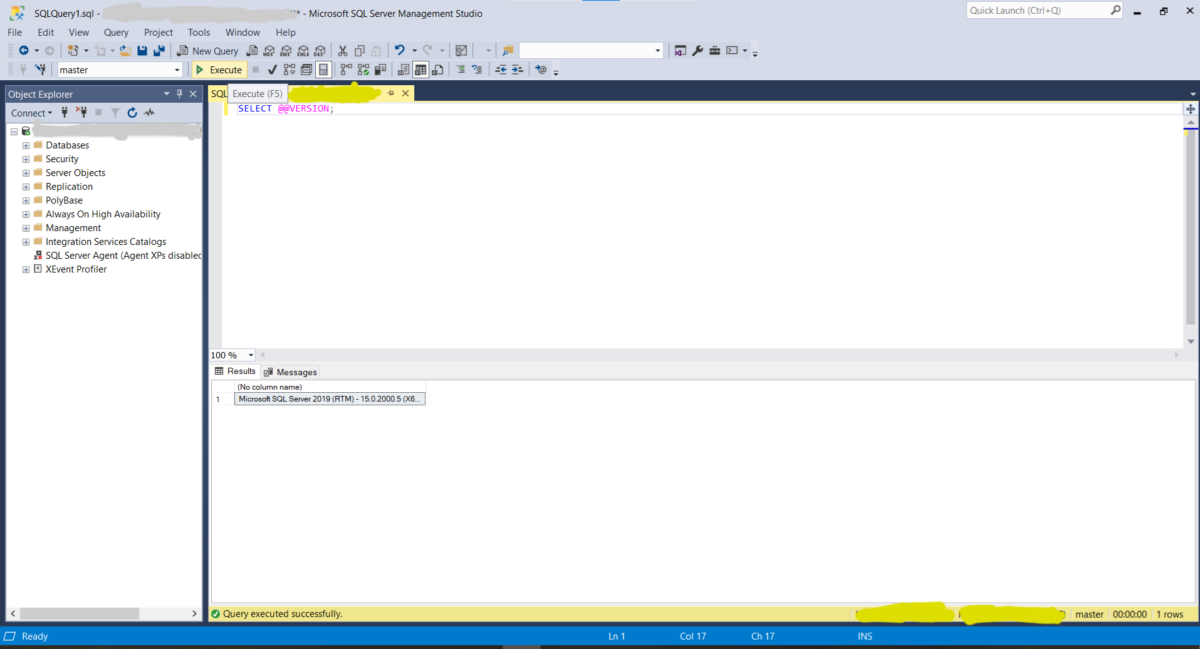
- Similarly, you can see the current version by typing “SELECT @@VERSION;”.
This is the simplest way to connect to the server and start writing queries. If you have been using the CLI tools for any other database management systems such as MySQL or PostgreSQL, then you can use the sqlcmd utility to operate the SQL server using the command line interface.
Conclusion
In conclusion, using SQL Server Management Studio (SSMS) has enabled us to successfully establish a connection to our SQL Server 2019. This is an important step in accessing and manipulating the data stored on the server, and SSMS is a useful tool for managing and administering SQL Server databases. With a successful connection, we can now begin to work with the data on the server in a variety of ways, such as querying and modifying data.