
In this tutorial, we will learn about the MySQL SHOW WARNINGS statement. It’s a MySQL diagnostic statement that’s the same as the MySQL SHOW ERRORS statement. We’ll look at the SHOW WARNINGS statement’s syntax and learn about several parts of it through examples. This will be a brief guide, so stay with us until the conclusion!
Also read: MySQL SHOW ERRORS [Easy Tutorial]
Introduction to MySQL SHOW WARNINGS
MySQL SHOW WARNINGS is a diagnostic statement as mentioned above. Unlike the SHOW ERRORS statement which is used to display only errors instead of warnings and notes, the SHOW WARNINGS statement is used to display information about conditions such as errors, warnings and notes.
The warnings could be generated by the DDL commands such as CREATE TABLE and ALTER TABLE as well as DML commands such as INSERT, UPDATE, DELETE and LOAD DATA.
It is a simple statement that displays all the warning information raised in the query. However, we can control the number and offset of warnings to display on the screen by using optional parameters offset and row count.
The SHOW WARNINGS shows information about the situations that have arisen as a result of the current session’s most recent nondiagnostic statement. SHOW WARNINGS displays the conditions that occurred from the most recent statement’s parsing problem, regardless of statement type (diagnostic or nondiagnostic).
Along with it, if we want to display only the total number of errors, we can use the COUNT function. We will learn this below through examples.
Syntax of MySQL SHOW WARNINGS Statement
To display all types of warnings, the following statement is used-
SHOW WARNINGS;Code language: SQL (Structured Query Language) (sql)The above statement will show all warnings without any limit and offset. To limit the warnings count, we can use the LIMIT option. Following is the correct syntax to use the LIMIT –
SHOW WARNINGS [LIMIT [offset,] row_count];Code language: SQL (Structured Query Language) (sql)Where,
- offset – It indicates the starting index of warning. For example, offset 5 denotes starting from the 5th warning.
- row_count – It indicates the total number of warnings to display.
To get the total number of warnings, we can use the COUNT function with the SHOW ERRORS statement as shown below-
SHOW COUNT(*) WARNINGS;Code language: SQL (Structured Query Language) (sql)Alternatively, we can use the system variable @@warning_count to display the total number of errors as shown in the below syntax-
SELECT @@warning_count;Code language: SQL (Structured Query Language) (sql)It’s important to note that the SHOW WARNINGS statement is a diagnostic one that doesn’t erase the message list, but the SELECT statement, which is a nondiagnostic one, does.
Examples of MySQL SHOW WARNINGS Statement
Now let’s take some examples of each syntax stated above to check what type of results we get.
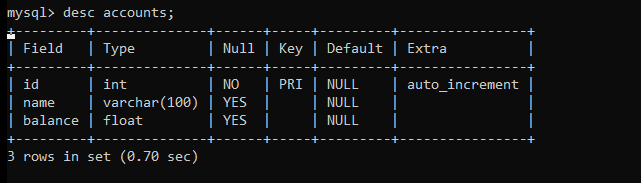
To demonstrate the use of the SHOW WARNINGS statement, we will use the table “accounts “of the following schema.
Now, let’s display the values of the column amount which does not exist.
SELECT amount FROM accounts;
SHOW WARNINGS;Code language: SQL (Structured Query Language) (sql)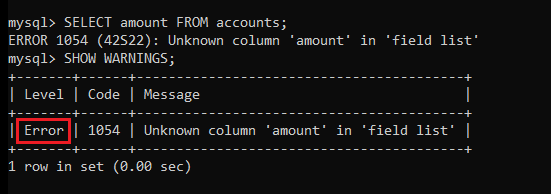
As you can see, the SHOW WARNINGS statement shows the information about the error. As mentioned earlier, the SHOW WARNINGS statement displays errors, warnings and notes rather than only warnings.
Now let’s try to delete the whole table using the DROP TABLE with the IF EXISTS option. If we use the IF EXISTS with the DROP TABLE statement, we won’t get any error but a warning would be generated. Check the below image.
DROP TABLE IF EXISTS notExists;
SHOW WARNINGS;Code language: SQL (Structured Query Language) (sql)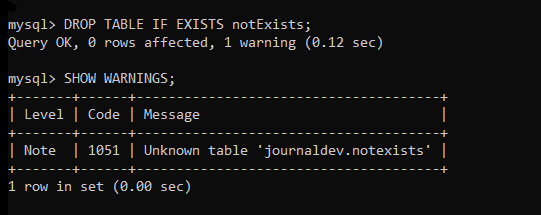
As you can see, the first query was executed successfully but it left a warning. When we tried to display the warning message, we get the note “unknown table”.
Now let’s demonstrate the use of the LIMIT option using the below example.
Let’s display three dates using the SELECT statement. But here, we will use the DATE_SUB() function to add/subtract intervals from the particular dates. The dates we mention below will be incorrect and hence we would get warning messages. Check below-
SELECT
DATE_SUB('2021-02-29', INTERVAL - 1 DAY),
DATE_SUB('2021-06-32', INTERVAL + 2 DAY),
DATE_SUB('2021-15-25', INTERVAL + 5 DAY);
SHOW WARNINGS;Code language: SQL (Structured Query Language) (sql)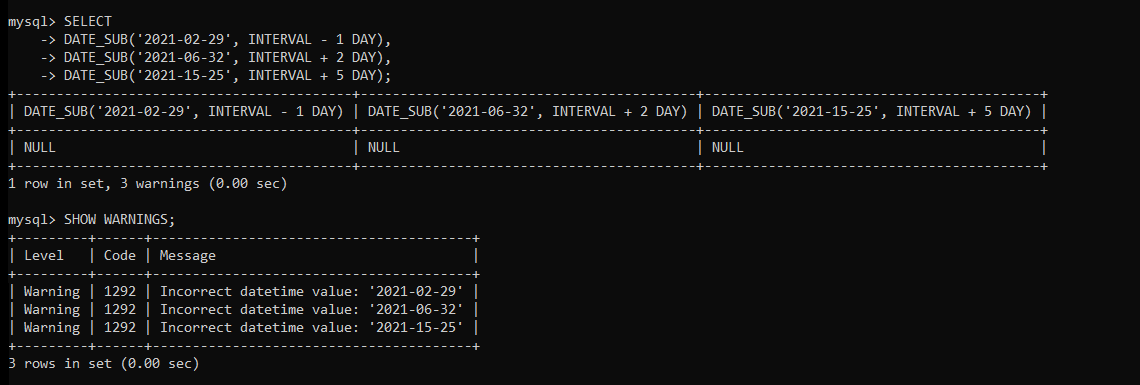
As you can see, we have received multiple warning messages. Let’s display only two warnings using the LIMIT option.
SHOW WARNINGS LIMIT 2;Code language: SQL (Structured Query Language) (sql)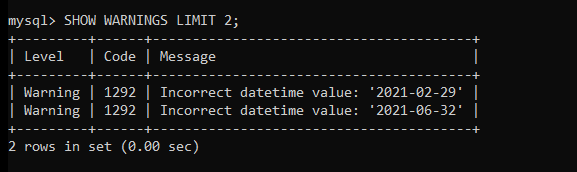
As you can see, we have received only two warnings.
MySQL MAX_ERROR_COUNT Variable
MySQL provides a system variable MAX_ERROR_COUNT to store the maximum number of warnings, errors and notes on the server.
You can change the default value of the MAX_ERROR_COUNT variable using the below method. But before that, let’s see how to check the default value of the MAX_ERROR_COUNT variable.
SHOW VARIABLES LIKE 'max_error_count';Code language: SQL (Structured Query Language) (sql)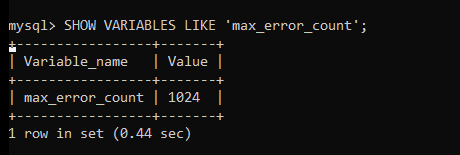
As you can see, the default value is set to 1024. Let’s change it to 2048.
SET max_error_count=2048;
SHOW VARIABLES LIKE 'max_error_count';Code language: SQL (Structured Query Language) (sql)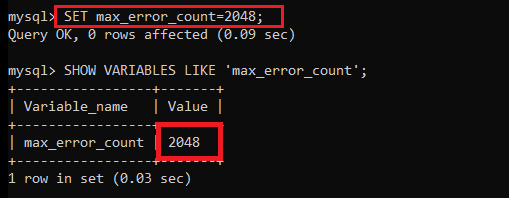
As you can see, we have successfully changed the default value of the MAX_ERROR_COUNT variable. Note that, if you set the value of the MAX_ERROR_COUNT to zero, MySQL will disable the message storage. However, the WARNING_COUNT will still show you the number of errors, warnings and notes.
Conclusion
In this tutorial, we learned about the MySQL SHOW WARNINGS statement, its syntax and its examples. It is a straightforward topic and you don’t need to spend too much time on it to understand it. If you look at the topic, It is quite similar to the SHOW ERROR statement, isn’t it! If you like this tutorial, don’t forget to share it with your friends and see you in the next tutorial!