In this tutorial, we’ll learn how we can back up and restore a database or all the databases in MySQL using MySQL Workbench.
Introduction
While working with databases, we perform a lot of changes over a database. Sometimes we make huge mistakes like dropping a database or dropping a table. When we don’t keep backups it’s impossible to recover the database. For cases like these, we need to backup our database for future recoveries or migration.
Let’s get started!
Backing up Databases using MySQL workbench
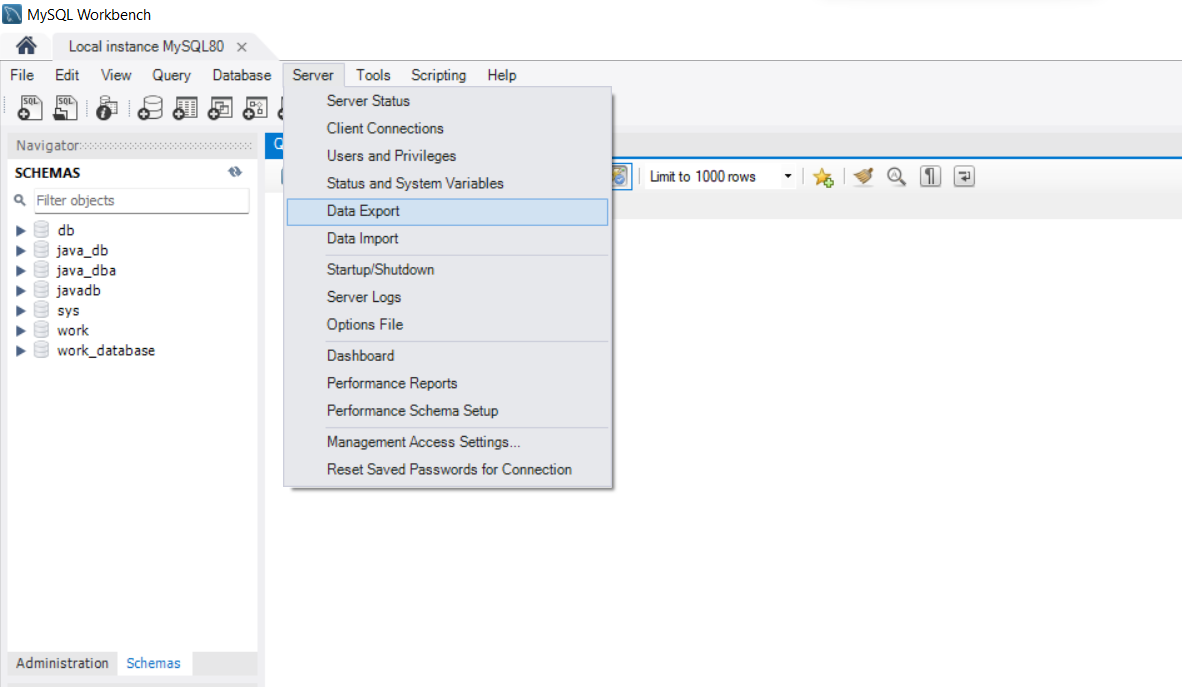
First of all, we’ll to connect to MySQL Workbench. After connecting to the Workbench, click Server on the menu bar and select Data Export.
Next up, you’ll see a tab on your workbench for data export where you’ll see a list of all your databases. Select the checkboxes corresponding to the databases you want a backup for.
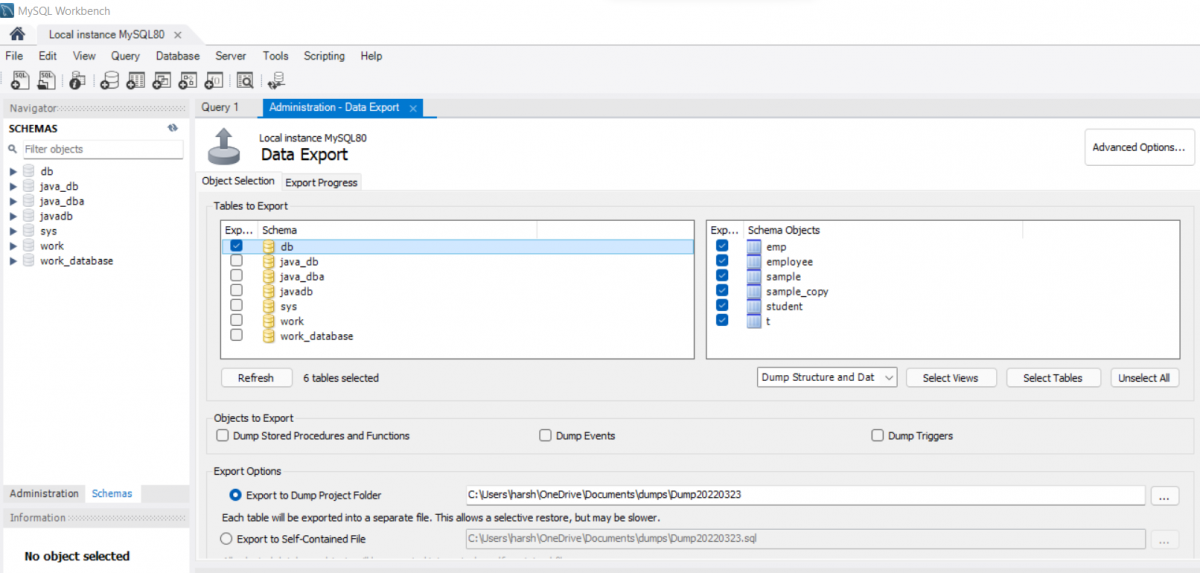
You can optionally de-select tables from a database that you don’t want to be backed up. But generally, we take the backup for the complete database.
There are two export options that are provided to you, and you can select either of them depending on your preference. Both the options are explained below:
- Export to Dump Project Folder: This option will help you to back up the database’s table individually in a dump folder, which means when you want a backup for the table, you can recover them separately, or you can recover those tables which are useful for you and leave the rest. It can be a time-consuming process depending on the size or the number of your tables.
- Export to Self-Contained File: This option will help you to create a backup for all the tables to a self-contained file and when you need to recover it, you’ll recover all the tables in a go within the same database, which means you won’t be able to recover them individually. This method is a bit faster than exporting files separately.
We’ll be exporting the database using Export to Self-Contained File, which will export all the tables in a self-contained file.

After selecting your preferences, you can click on Start Export. This will start the export for all the databases you’ve selected.
After the backup is done, there will be mentioned the path of the dump which you’ve created. You must check for the errors, if any, that have occurred during the backup.
So that’s how you back up any of your databases, but how to recover them?
Recover Database using MySQL Workbench
Now whenever we are importing a dump file, the most important thing is to create a database or select a database you want these backup files to be stored. For that, you must know the location of the folder where you’ve created the dump.
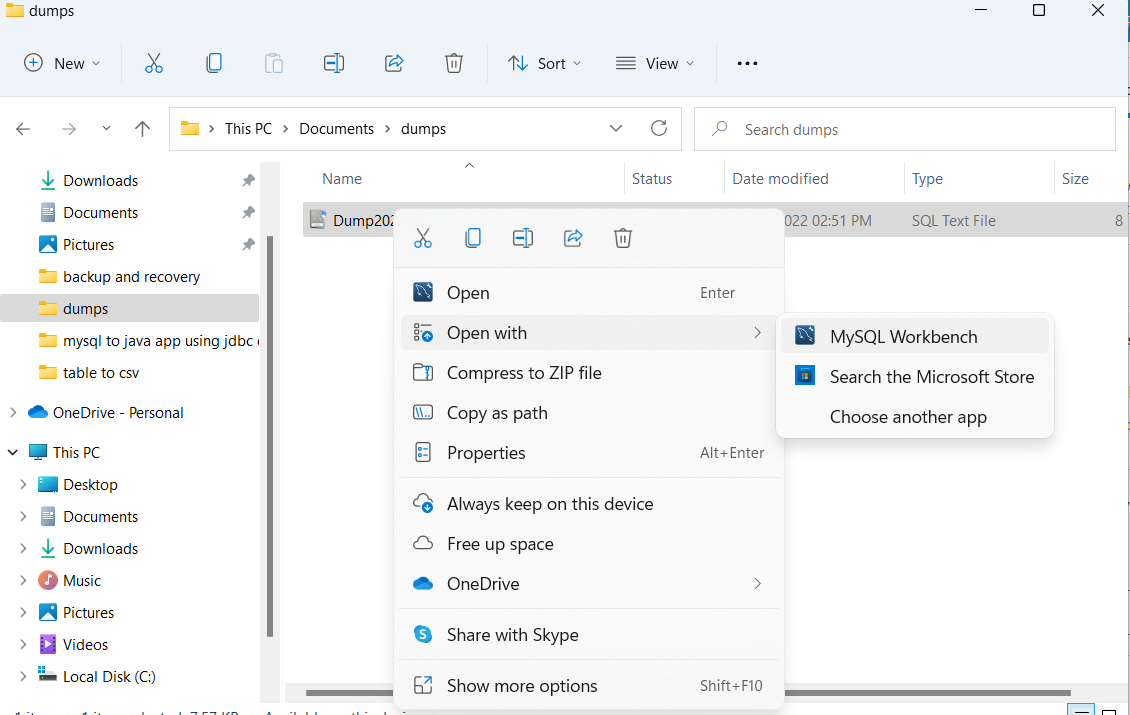
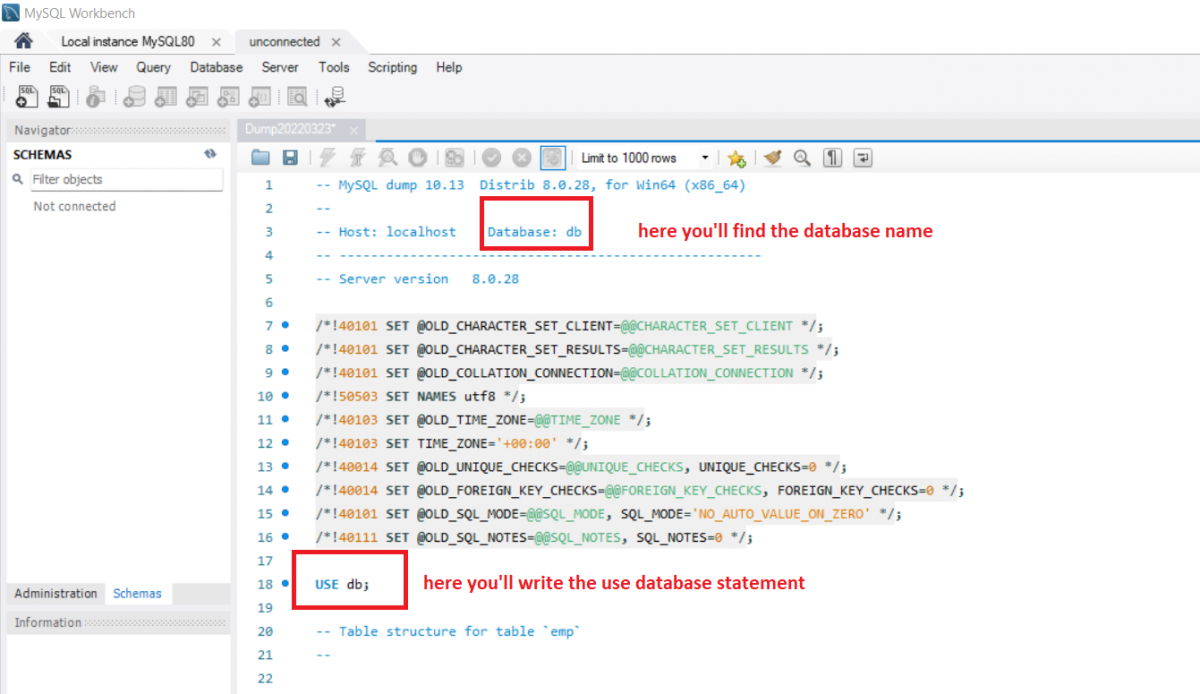
Open the dump file or the backup file using MySQL workbench, and write the statement:
USE databasename;Code language: SQL (Structured Query Language) (sql)The database name will be mentioned in the dump file or you can create a new database and write the use database statement, for convenience you can just use the same database name which is mentioned over there as shown in the below image and saves the file:
Now in MySQL workbench, select the Server menu from the menubar and click on Data Import.
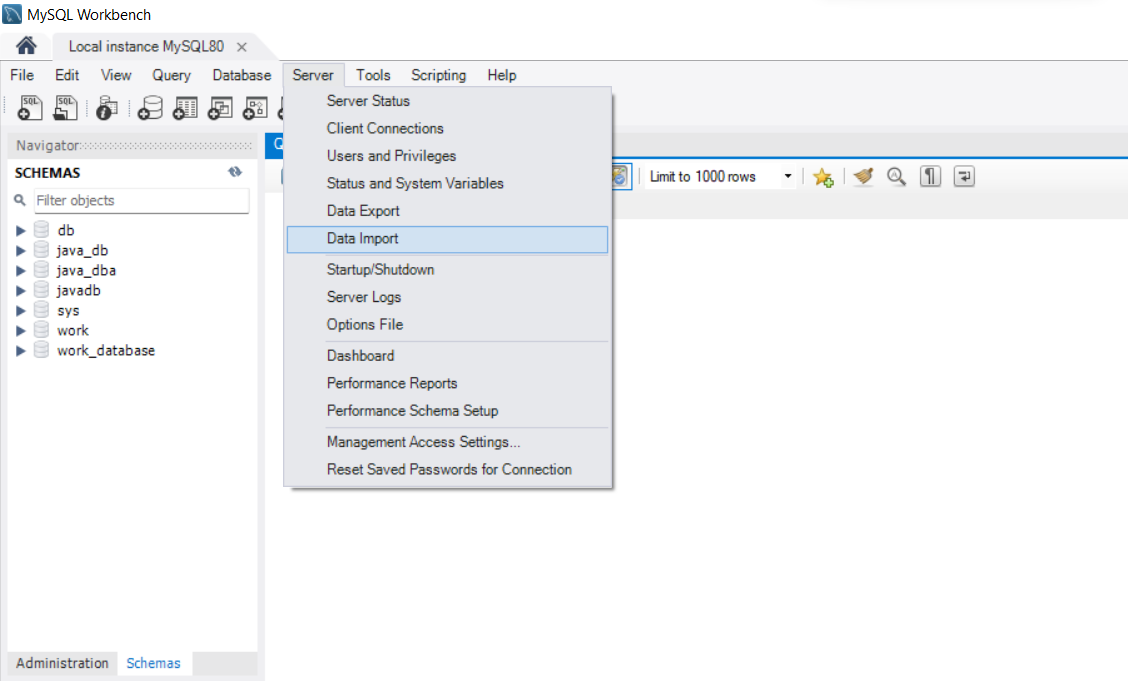
After clicking on the data import option, you will see a new tab will appear called data import\reset. In this data import tab, you’ll see two options to import data from:
1) Import from the dump project folder
2) Import from self-contained file
In our example, we exported a self-contained file which means that we’ll import a self-contained file only. Select the second option, import a self-contained file:
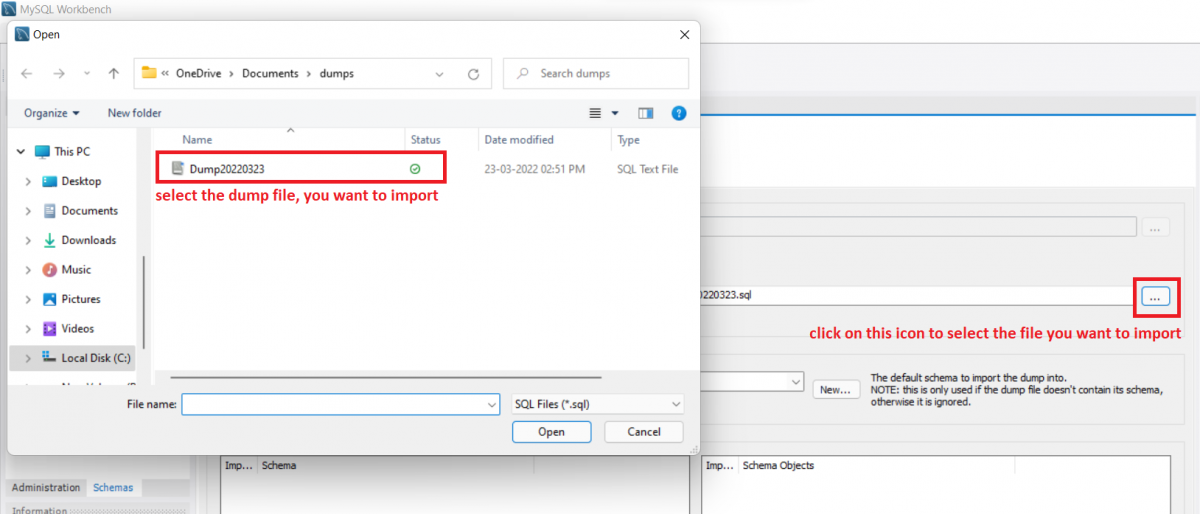
After, selecting the file you can click on Start Import.
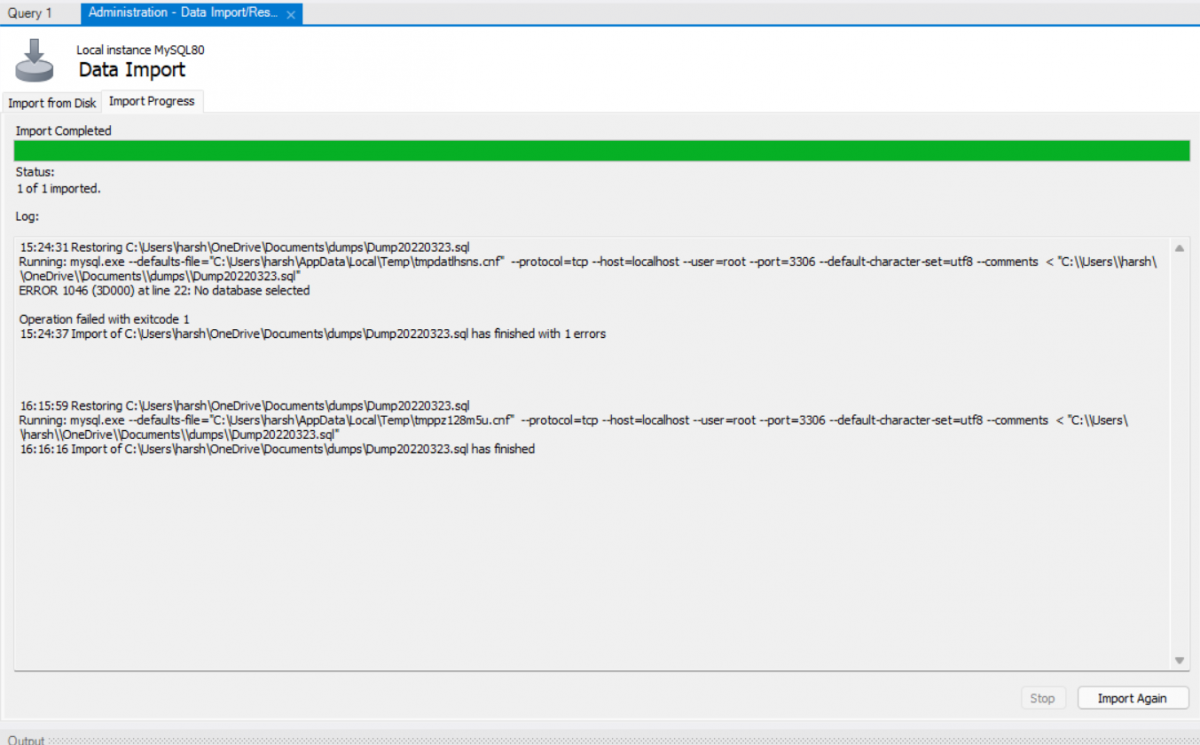
Check if the recovery had any error, in our example, we recovered the dump in the second attempt as we didn’t mention which database to use at first.
Conclusion
That’s how you can backup any database and in the future can recover it using MySQL Workbench.
Useful Resource:
https://dev.MySQL.com/doc/workbench/en/wb-MySQL-enterprise-backup-backup-recovery.html
