JDBC (Java Database Connectivity) is a Java API that enables you to connect to a MySQL database using a JDBC driver. In this tutorial, we will show you how to connect to a MySQL database using the JDBC driver provided by MySQL. We will also show you how to create and execute SQL queries against the MySQL database.
JDBC Driver is software that acts as a middleware between a java application and a database, JDBC Driver helps java applications to connect and interact with the database. Web applications and software uses databases to store data, Java applications also need databases. We can use several databases with java and today we’re going to learn how to connect MySQL to a Java application.
For this tutorial, You must have the following software configured to your system:
- MySQL: MySQL is a database management software owned by Oracle Inc. We’ll be using MySQL Database for this tutorial, If you have not installed MySQL yet on your Desktop, download it from here.
- Java: Java is a programming language, You need to set this programming language up on your desktop in order to use its features. You can download it from here.
- IDE: IDE stands for Integrated Development Environment, it’s entirely optional for you to have an IDE but it’s good to have when you’re working on software development or application development project. As we are using java language we have a variety of IDE from which we can choose like, VS Code, NetBeans, Eclipse, etc. In this tutorial we’ll be using Eclipse IDE, You can follow along with any other IDE because the steps will be the same but familiarity with the IDE is a necessity.
Now, that we are all done with our setup one last thing we need to download before we get started is a JDBC driver. Connector J is a JDBC driver. You’ll need this folder as we’ll use a jar file which will be present within this folder to connect our java application to MySQL. You can use the link here to download Connector J.
Choose the platform-independent version and download the zip folder. Extract the zip folder once it gets downloaded. We’ll use the folder later in this tutorial.
Connecting Java Application With a MySQL Database Using JDBC Drivers
Below are the steps for connecting a java application with a MySQL database:
- Create a table in the MySQL database.
- Create a java project on Eclipse or any other IDE.
- Set the JAR file in the build path.
- Write the Driver connection code and execute.
Let’s go through the pointers one by one.
1. Create a Table in MySQL Database
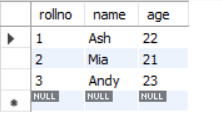
If you already have created a table you can skip this part and move on to the next topic, otherwise, you can follow the following command to create a table. We can use both MySQL command line or MySQL workbench, I’ll be showing you how to create a table using the command line.
CREATE DATABASE databasename;
USER databasename;
CREATE TABLE tablename(column1 datatype, column2 datatype,...);
INSERT INTO tablename (column datatype, column2 datatype,...)  VALUES (value1, value2, ...);Code language: SQL (Structured Query Language) (sql)
You should process the above command in the same order. Please remember to add some values to your table.
2. Create a java project
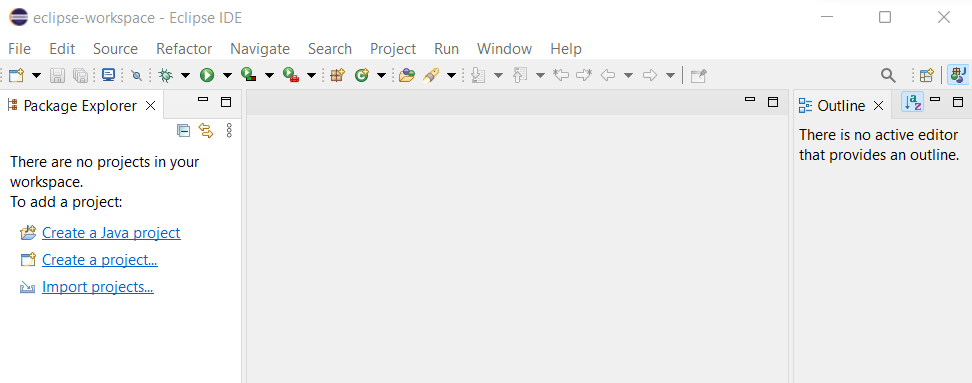
We’ll be creating the java project using eclipse IDE, you can use any other IDE as well. Open eclipse and click on Create a Java project:
Create a new project:
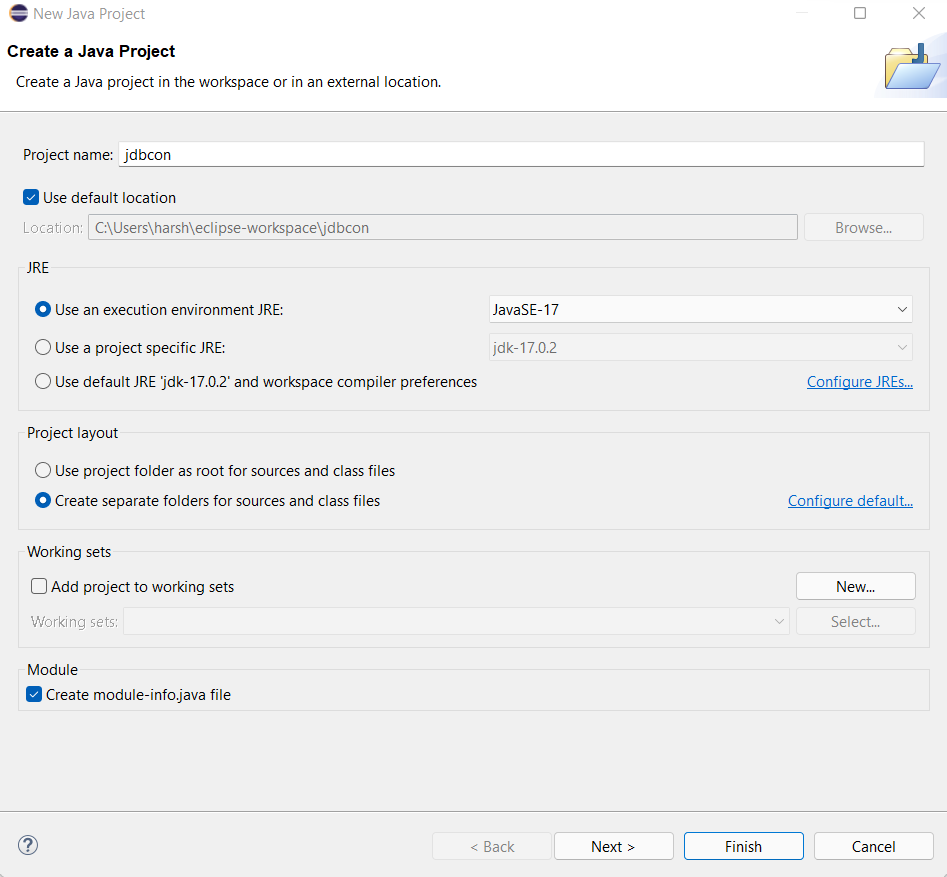
Note: Uncheck the Create module-info.java file because it creates a little problem when we are writing the driver code.
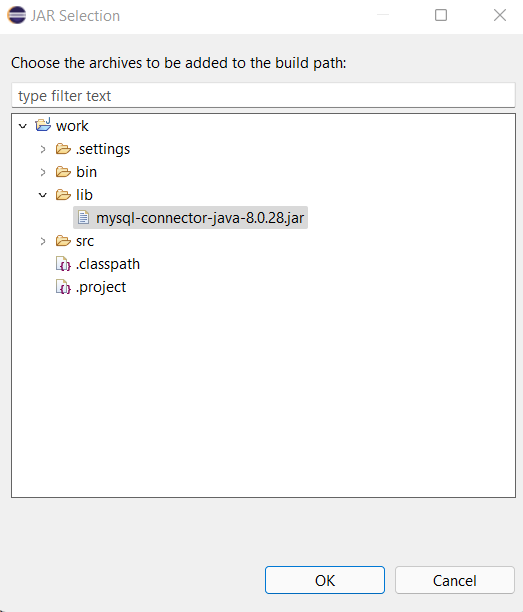
3. Add a jar file to your project
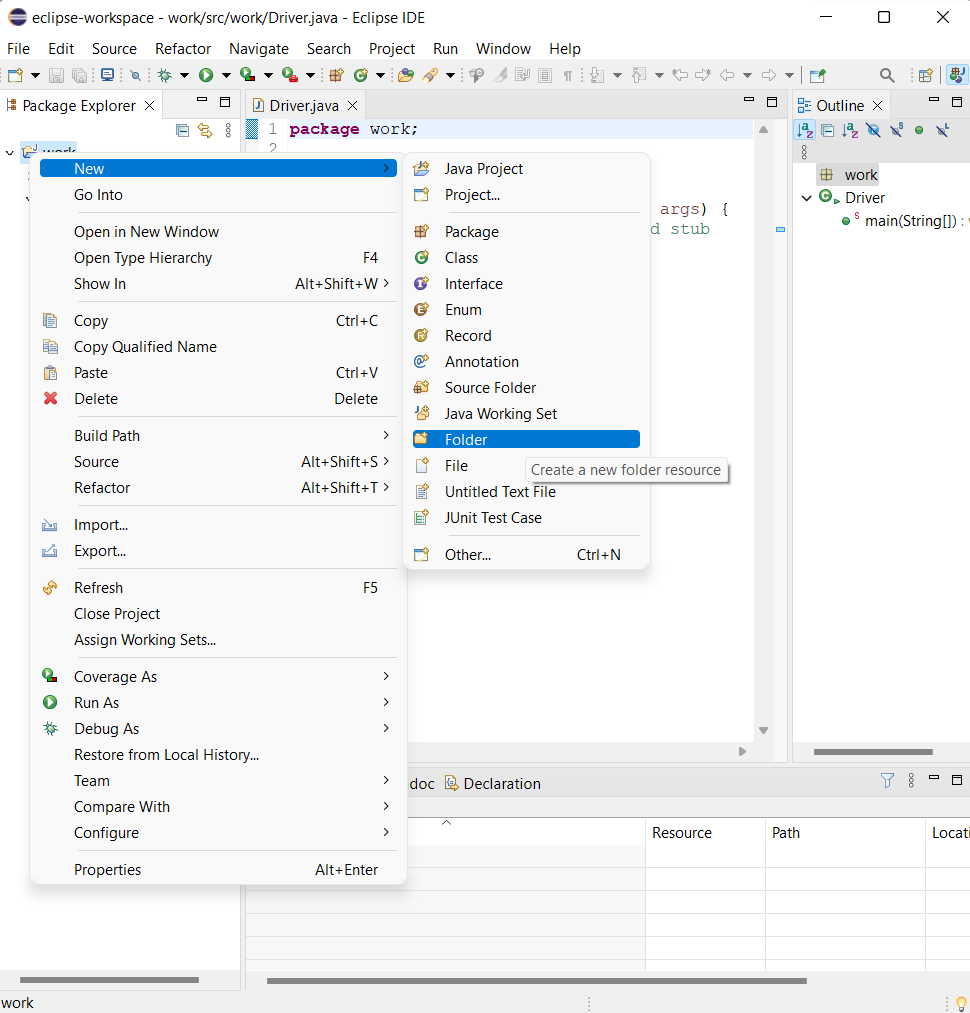
Right-click on the project, go to new and select folder. Create a new folder and name it as lib.
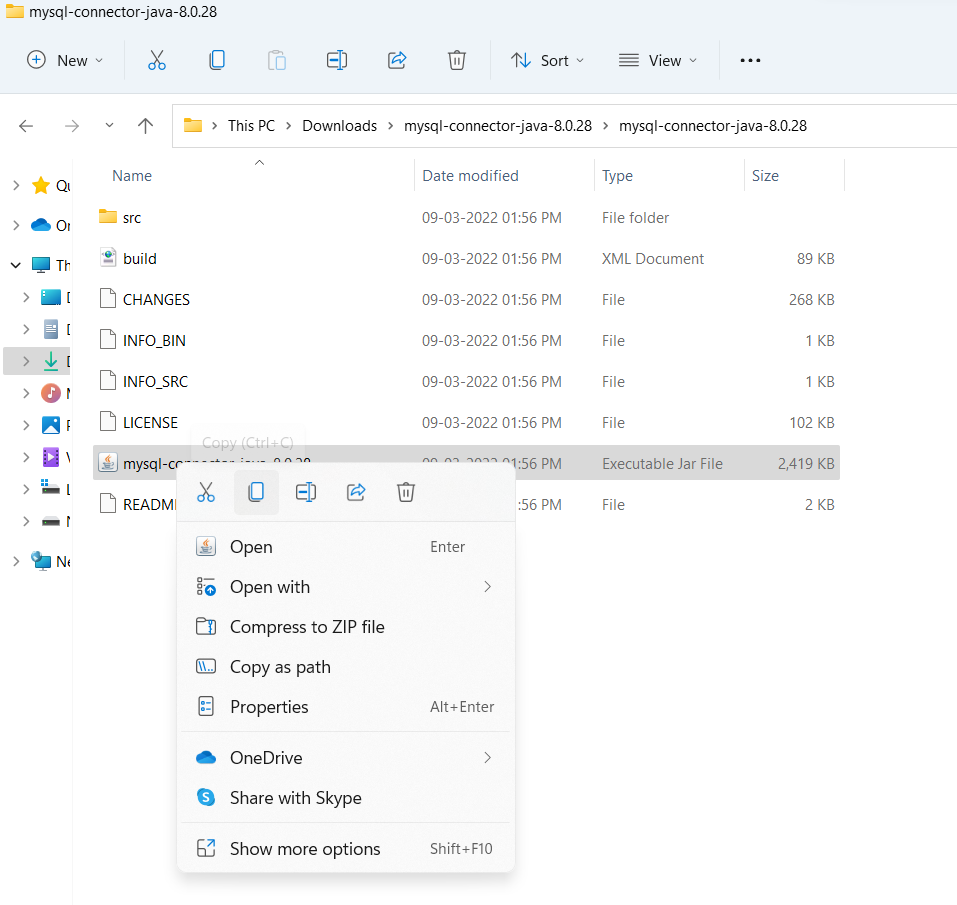
Now, open the Connector/J folder which you downloaded earlier, and copy the jar file.
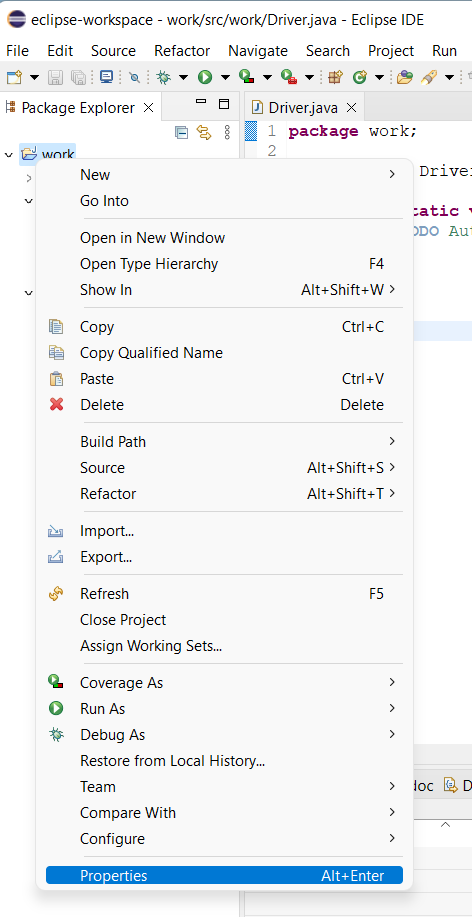
Go to project property, by right-clicking on the folder.
Select Java Build Path and then select libraries tab.
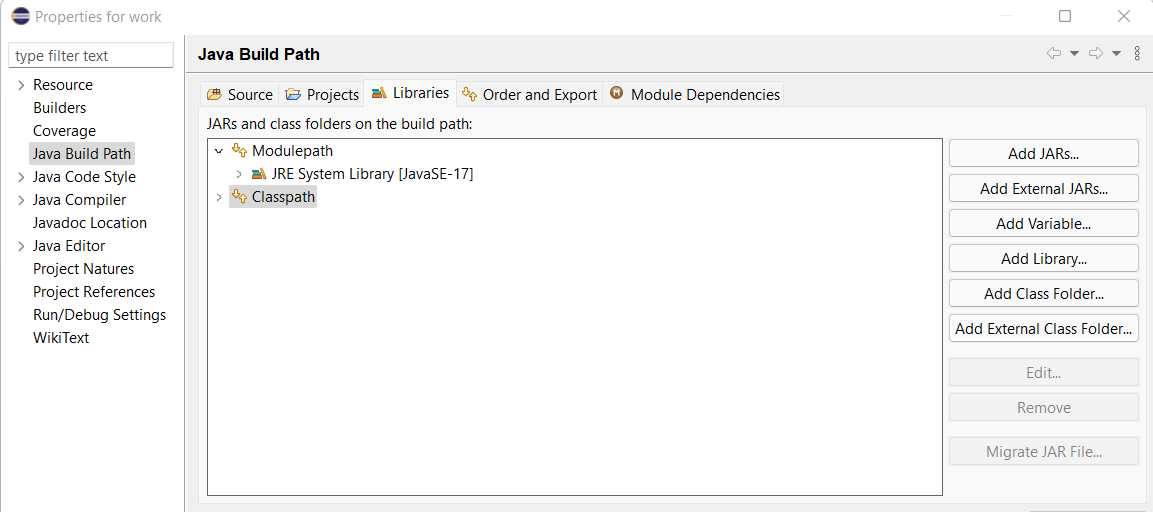
Add the JAR file within Classpath and save it:
4. Create a Driver class and write the code to create a connection
Create a java class and name it driver:
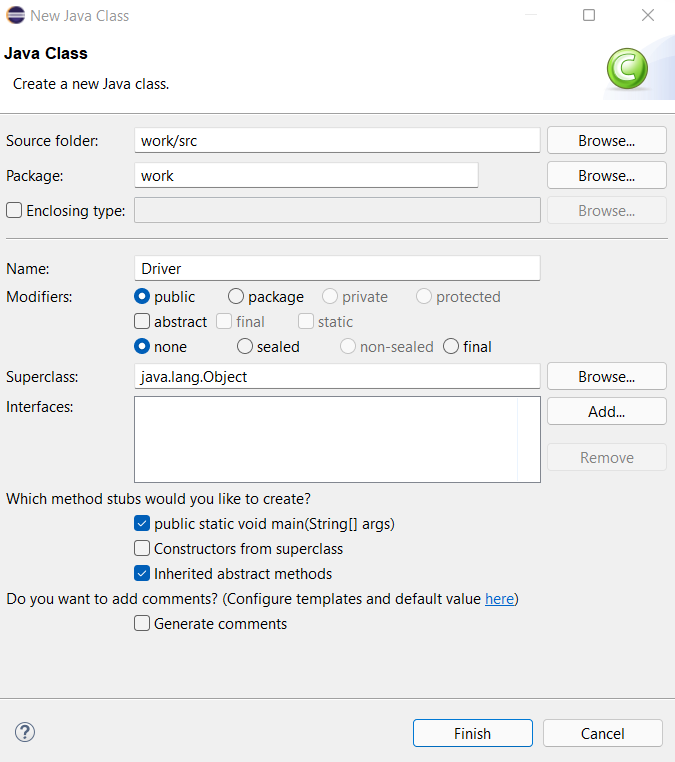
Now we’ll create a connection to MySQL Database. We’ll write the coding for the connection inside the driver.java application. There are four steps you need to remember to create a connection from java to any database:
- Geta a connection to the database
- Create a statement
- Execute SQL Query
- Process the result set
Below is the code for the driver class:
package work;
import java.sql.*;
public class Driver {
public static void main(String[] args) {
    // TODO Auto-generated method stub
    try {
        //get a connection to database
        Connection myConn = DriverManager.getConnection("jdbc:mysql://localhost:3306/database_name","username","password");
        //create a statement
        Statement myStmt = myConn.createStatement();
        //Execute SQL Query
        ResultSet myRs= myStmt.executeQuery("select * from table_name");
        //Process the result set
        while(myRs.next()) {
            System.out.print(myRs.getString("name")+"\n");         //you can write any query to fetch using SELECT statement
            //in this loop we fetched name column fron javacon table
        }
    }
    catch(Exception e) {
        e.printStackTrace();
    }

}
}Code language: PHP (php)
Run the application as Java Application by right-clicking on the screen:
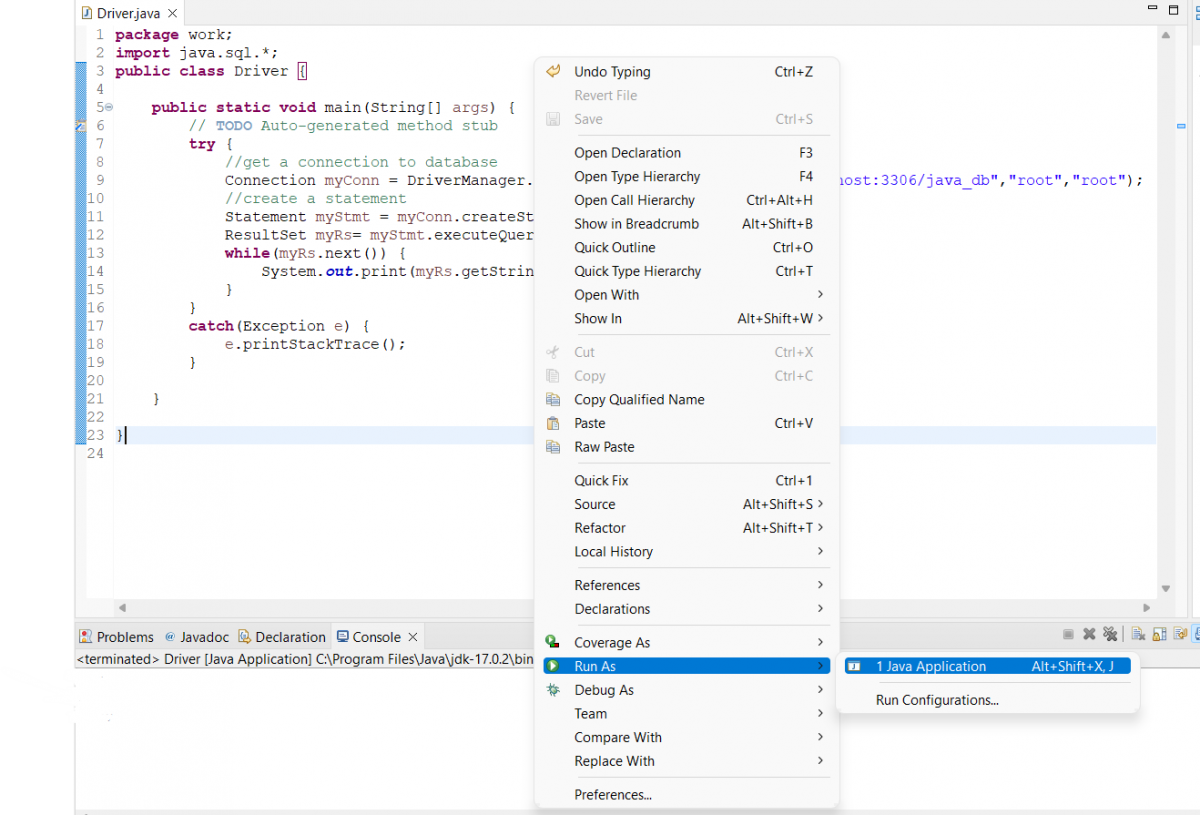
You will see the result in the console tab at the bottom of the screen.
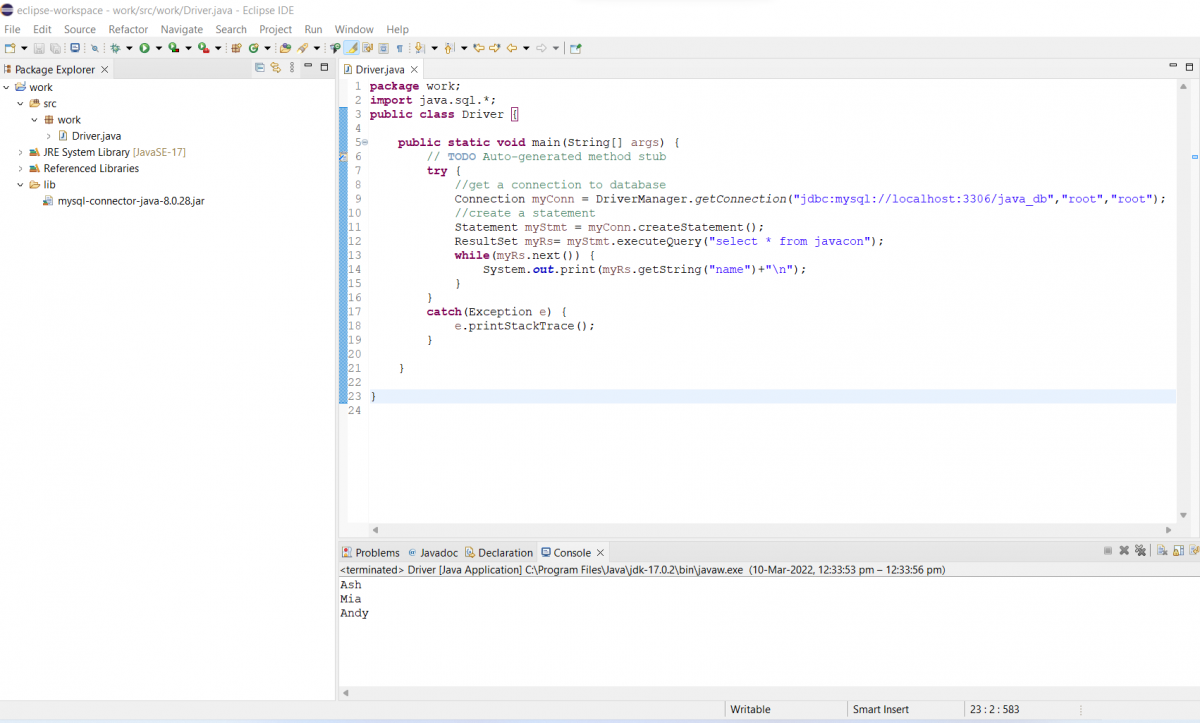
This is how to connect a MySQL database to any java application using JDBC Driver.
Conclusion
Now that you know how to connect to a MySQL database using JDBC, you can start developing applications that interact with the data in your database. Be sure to use the correct JDBC driver for your platform, and refer to the MySQL documentation if you need help connecting to your database. Thanks for reading!
